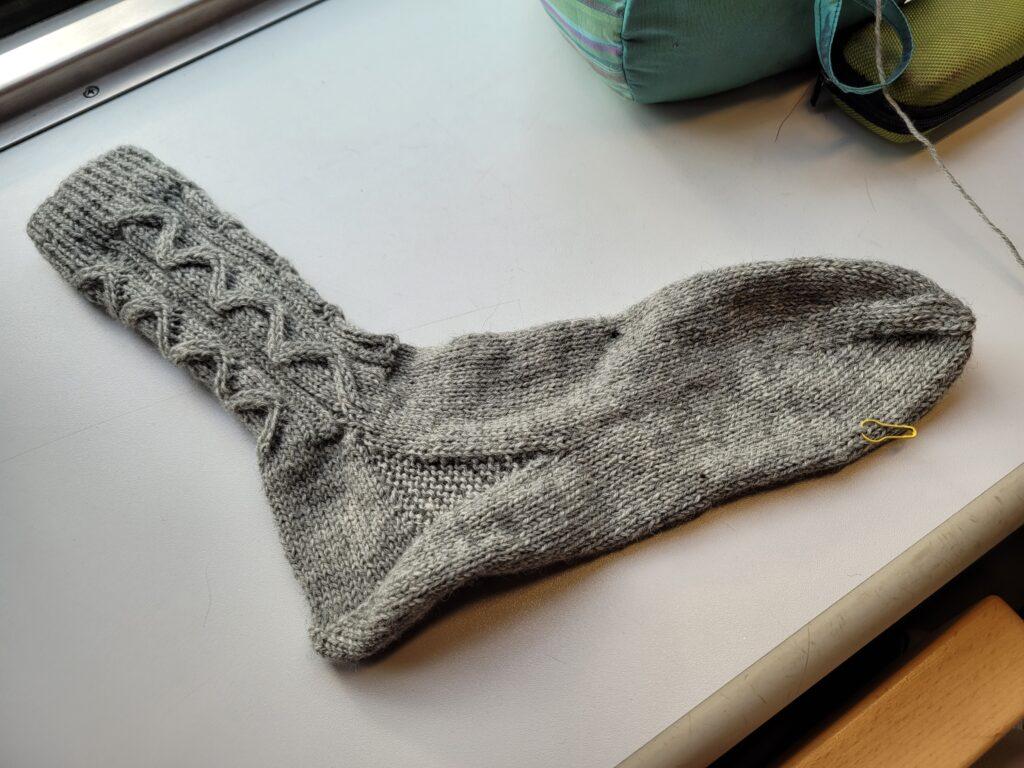
Ich stricke derzeit an selber ausgedachten Trachtensocken aus 6-facher Sockenwolle mit Nadelstärke 3,00 mm. Eine ist schon fertig, daher kann ich sie euch schon mal zeigen.

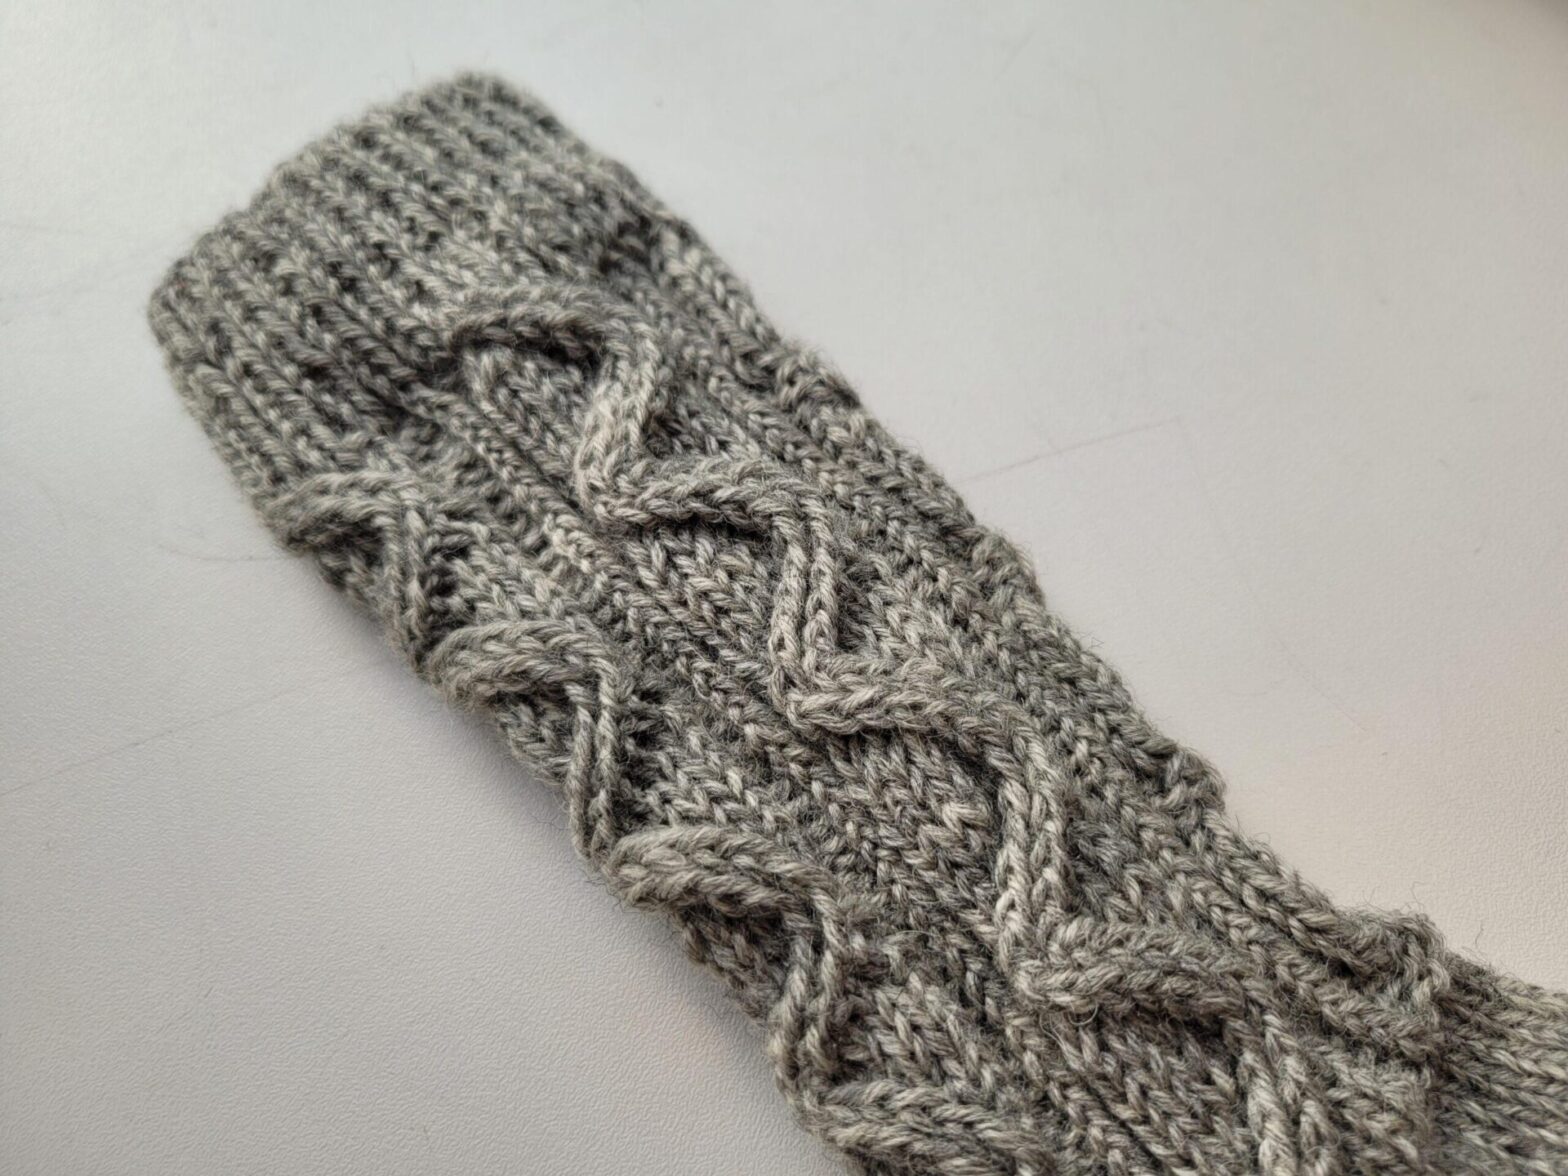
Ich habe 52 Maschen mit einem Nadelspiel angeschlagen und dann 12 Runden eins rechts, eins links gestrickt. Anschließend folgendes Muster, das hier nur für eine Nadel angegeben muss, es muss also je Runde insgesamt viermal gestrickt werden:
Reihe 1: *Zwei links stricken, eine Masche rechts verschränkt stricken, zwei Maschen links stricken*, eine Masche rechts verschränkt, eine Masche links, eine Masche rechts verschränkt, fünf Maschen rechts stricken. Die Angaben innerhalb der Sternchen bleiben den ganzen Schaft über gleich und werden daher nur noch durch das Symbol ** gekennzeichnet.
Reihe 2: **, #eine Masche mit einer Hilfsnadel abheben und nach vorne legen, die nächste Masche rechts stricken, dann die Masche auf der Hilfsnadel rechts verschränkt stricken, wieder eine Masche mit einer Hilfsnadel abheben und nach vorne legen, die nächste Masche links stricken, dann die Masche auf der Hilfsnadel rechts verschränkt stricken#, vier Maschen rechts stricken. Die Angaben zwischen den Symbolen # werden ab sofort mit dem Symbol ## gekennzeichnet
Reihe 3: **, eine Masche rechts, ##, drei Maschen rechts
Reihe 4: **, zwei Maschen rechts, ##, zwei Maschen rechts
Reihe 5: **, drei Maschen rechts, ##, eine Masche rechts
Reihe 6: **, vier Maschen rechts, ##
Reihe 7: **, fünf Maschen rechts, eine Masche rechts verschränkt, eine Masche links, eine Masche rechts verschränkt
Reihe 8: **, vier Maschen rechts, ~eine Masche mit einer Hilfsnadel abheben und nach hinten legen, die nächste Masche rechts verschränkt stricken, dann die Masche auf der Hilfsnadel links stricken, wieder eine Masche mit einer Hilfsnadel abheben und nach hinten legen, die nächste Masche rechts verschränkt stricken, dann die Masche auf der Hilfsnadel rechts stricken~. Die Angaben zwischen den Symbolen ~ werden ab sofort mit dem Symbol ~~ gekennzeichnet.
Reihe 9: **, drei Maschen rechts, ~~, eine Masche rechts
Reihe 10: **, zwei Maschen rechts, ~~, zwei Maschen rechts
Reihe 11: **, eine Masche rechts, ~~, drei Maschen rechts
Reihe 12: **, ~~, vier Maschen rechts
Fertig ist ein Mustersatz, den man nun beliebig verlängern kann, indem man einfach wieder bei Reihe 1 beginnt. Ich habe ihn vier mal gestrickt.
Erfahrene Strickerinnen und Stricker brauchen dafür natürlich keine Hilfsnadel, das ist jedem selber überlassen, wie er das macht. Auch wie dann die Ferse, der Fuß und die Spitze ausgestaltet werden sollen, bleibt jedem selber überlassen. Das Muster eignet sich auch für einen Schaft einer Socke, die von unten nach oben gestrickt wird. Falls die Maschenzahl nicht der notwendigen Anzahl von Maschen entspricht, kann durch eine Erweiterung der beiden links gestrickten Felder neben der rechts verschränkten Masche und / oder durch eine Erhöhung der Anzahl der Maschen, über die der Zopf läuft, angepasst werden. Aber Achtung: Wenn sich die Maschenzahl, über die der Zopf läuft, ändert, wird auch der Mustersatz insgesamt höher.
Den Zwickel habe ich kraus rechts gestrickt, um ein wenig das rustikale Gesamtbild zu bestätigen.
English:
I’m currently knitting some traditional socks of my own design in 6ply sock wool with a needle size of 3.00 mm. One is already finished, so I can show it to you already.

I cast on 52 stitches with a needle gauge and then knitted 12 rounds one right, one left. Then the following pattern, which must be given here only for one needle, so it must be knitted per round a total of four times:
Row 1: knit two purl stitches, knit one purl stitch, knit two purl stitches, knit one purl stitch, knit one purl stitch, knit five purl stitches. The details within the asterisks remain the same throughout the shaft and are therefore only indicated by the symbol **.
Row 2: **, #pick up one stitch with an auxiliary needle and place it to the front, knit the next stitch right, then knit the stitch on the auxiliary needle right interlaced, pick up another stitch with an auxiliary needle and place it to the front, knit the next stitch left, then knit the stitch on the auxiliary needle right interlaced#, knit four stitches right. The stitches between the symbols # will be marked with the symbol ## from now on.
Row 3: **, one stitch right, ##, three stitches right
Row 4: **, two stitches right, ##, two stitches right
Row 5: **, three stitches right, ##, one stitch right
Row 6: **, four stitches right, ##
Row 7: **, five stitches right, one stitch right interlaced, one stitch left, one stitch right interlaced
Row 8: **, four stitches right, ~pick up one stitch with an auxiliary needle and place it to the back, knit the next stitch right interlaced, then knit the stitch on the auxiliary needle left, again pick up one stitch with an auxiliary needle and place it to the back, knit the next stitch right interlaced, then knit the stitch on the auxiliary needle right~. The stitches between the symbols ~ will be marked with the symbol ~~ from now on.
Row 9: **, three stitches right, ~~, one stitch right
Row 10: **, two stitches right, ~~, two stitches right
Row 11: **, one stitch right, ~~, three stitches right
Row 12: **, ~~, four stitches right side up
You have finished a pattern set, which you can now extend as you like by simply starting again at row 1. I knitted it four times.
Experienced knitters don’t need an auxiliary needle for this, of course, it’s up to each person to decide how to do it. Also how then the heel, the foot and the tip should be designed, is up to everyone. The pattern is also suitable for a shank of a sock, which is knitted from the bottom up. If the number of stitches does not correspond to the necessary number of stitches, it can be adjusted by extending the two left-hand knitted squares next to the right-hand interlaced stitch and / or by increasing the number of stitches over which the cable runs. But be careful: if the number of stitches over which the cable runs changes, the overall pattern size will also increase.
I knitted the gusset in curly right to confirm a bit the overall rustic look.

Schreibe einen Kommentar